Mobiele aanraakinvoerjoystick in Unity
Om een bestuurbaar personage in een mobiel spel te maken, moet je knoppen toevoegen die visueel op het scherm worden weergegeven en reageren op de aanraakinvoer.
In deze tutorial laat ik zien hoe je een joystickachtige knop maakt in Unity, die vooral geschikt is voor bewegingsbediening op touchscreen-telefoons.

U kunt het onderstaande voorbeeld ook gebruiken om meer knoppen en joysticks toe te voegen. Dus laten we beginnen!
Stap 1: Maak alle benodigde scripts
- Maak twee C#-scripts met behulp van de onderstaande broncode
MobileJoystick_UI.cs
using UnityEngine;
using UnityEngine.UI;

public class MobileJoystick_UI : MonoBehaviour
{

    //Mobile controller graphics
    public Sprite navigationCircle;
    public Sprite navigationButton;
    //Use this in your movement script for the input control
    public Vector2 moveDirection;
    //Joystick components size
    int circleSize = 120;
    int buttonSize = 100;
    //How far the joystick should be placed from the side of the screen
    int marginLeft = 100;
    //How far the joystick should be placed from the bottom of the screen
    int marginBottom = 100;

    Canvas mainCanvas;

    //Mobile movement
    [System.Serializable]
    public class JoystickButton
    {
        public Image backgroundCircle;
        public Image mainButton;
        public Rect defaultArea;
        public Vector2 touchOffset;
        public Vector2 currentTouchPos;
        public int touchID;
        public bool isActive = false;
    }

    //Move joystick data
    JoystickButton moveTouch = new JoystickButton();

    public static MobileJoystick_UI instance;

    // Start is called before the first frame update
    void Start()
    {
        if (instance != null)
        {
            //There is another instance already present, remove this one
            Destroy(gameObject);
            return;
        }
        //Assign this instance to a static variable so you can access the movement direction directly at MobileJoystick_UI.instance.moveDirection
        instance = this;

        //This function will initialize canvas element along with the joystick button
        GameObject tmpObj = new GameObject("Canvas");
        tmpObj.transform.position = Vector3.zero;
        mainCanvas = tmpObj.AddComponent<Canvas>();
        mainCanvas.renderMode = RenderMode.ScreenSpaceOverlay;
        mainCanvas.pixelPerfect = true;

        //Add Canvas Scaler component
        CanvasScaler canvasScaled = tmpObj.AddComponent<CanvasScaler>();
        canvasScaled.scaleFactor = 1;
        canvasScaled.referencePixelsPerUnit = 100;

        //Add Graphic Raycaster element
        tmpObj.AddComponent<GraphicRaycaster>();

        //Setup navigation background
        GameObject cntrlTmpObj = new GameObject("Movement Circle");
        cntrlTmpObj.transform.position = Vector3.zero;
        cntrlTmpObj.transform.parent = tmpObj.transform;
        moveTouch.backgroundCircle = cntrlTmpObj.AddComponent<Image>();
        moveTouch.backgroundCircle.sprite = navigationCircle;
        moveTouch.backgroundCircle.rectTransform.anchorMin = new Vector2(0, 0);
        moveTouch.backgroundCircle.rectTransform.anchorMax = new Vector2(0, 0);
        moveTouch.backgroundCircle.rectTransform.sizeDelta = new Vector2(circleSize, circleSize);
        moveTouch.backgroundCircle.rectTransform.pivot = new Vector2(0, 0);
        moveTouch.backgroundCircle.rectTransform.position = new Vector3(marginLeft, marginBottom, 0);

        //Navigation button
        cntrlTmpObj = new GameObject("Movement Button");
        cntrlTmpObj.transform.position = Vector3.zero;
        cntrlTmpObj.transform.parent = tmpObj.transform;
        moveTouch.mainButton = cntrlTmpObj.AddComponent<Image>();
        moveTouch.mainButton.sprite = navigationButton;
        moveTouch.mainButton.rectTransform.anchorMin = new Vector2(0, 0);
        moveTouch.mainButton.rectTransform.anchorMax = new Vector2(0, 0);
        moveTouch.mainButton.rectTransform.sizeDelta = new Vector2(buttonSize, buttonSize);
        moveTouch.mainButton.rectTransform.pivot = new Vector2(0, 0);
        moveTouch.mainButton.rectTransform.position = new Vector3(marginLeft + (circleSize - buttonSize) / 2, marginBottom + (circleSize - buttonSize) / 2, 0);

        //Save the default location of the joystick button to be used later for input detection
        moveTouch.defaultArea = new Rect(moveTouch.mainButton.rectTransform.position.x,
            moveTouch.mainButton.rectTransform.position.y,
            moveTouch.mainButton.rectTransform.sizeDelta.x,
            moveTouch.mainButton.rectTransform.sizeDelta.y);
    }

    // Update is called once per frame
    void Update()
    {
        //Handle joystick movement
#if (UNITY_ANDROID || UNITY_IOS || UNITY_WP8 || UNITY_WP8_1) && !UNITY_EDITOR
        //Mobile touch input
        for (var i = 0; i < Input.touchCount; ++i)
        {
            Touch touch = Input.GetTouch(i);

            if (touch.phase == TouchPhase.Began)
            {
                MobileButtonsCheck(new Vector2(touch.position.x, Screen.height - touch.position.y), touch.fingerId);
            }

            if (touch.phase == TouchPhase.Moved )
            {
                if(moveTouch.isActive && moveTouch.touchID == touch.fingerId)
                {
                    moveTouch.currentTouchPos = touch.position;
                }
            }

            if (touch.phase == TouchPhase.Ended || touch.phase == TouchPhase.Canceled)
            {
                MobileButtonStop(touch.fingerId);
            }
        }
#else
        //Desktop mouse input for editor testing
        if (Input.GetMouseButtonDown(0))
        {
            MobileButtonsCheck(new Vector2(Input.mousePosition.x, Screen.height - Input.mousePosition.y), -1);
        }

        if (Input.GetMouseButtonUp(0))
        {
            MobileButtonStop(-1);
        }

        moveTouch.currentTouchPos = Input.mousePosition;
#endif

        //Moving
        if (moveTouch.isActive)
        {
            moveTouch.mainButton.rectTransform.position = new Vector3(moveTouch.currentTouchPos.x - moveTouch.touchOffset.x, moveTouch.currentTouchPos.y - moveTouch.touchOffset.y);
            moveDirection.x = moveTouch.mainButton.rectTransform.position.x - moveTouch.defaultArea.x;
            moveDirection.y = moveTouch.mainButton.rectTransform.position.y - moveTouch.defaultArea.y;

            if (Mathf.Abs(moveDirection.x) < 19)
            {
                moveDirection.x = 0;
            }
            else
            {
                moveDirection.x = Mathf.Clamp(moveDirection.x / 75.000f, -1.000f, 1.000f);
            }

            if (Mathf.Abs(moveDirection.y) < 19)
            {
                moveDirection.y = 0;
            }
            else
            {
                moveDirection.y = Mathf.Clamp(moveDirection.y / 75.000f, -1.000f, 1.000f);
            }
        }
        else
        {
            moveTouch.mainButton.rectTransform.position = new Vector3(moveTouch.defaultArea.x, moveTouch.defaultArea.y);
            moveDirection = Vector2.zero;
        }
    }

    //Here we check if the clicked/tapped position is inside the joystick button
    void MobileButtonsCheck(Vector2 touchPos, int touchID)
    {
        //Move controller
        if (moveTouch.defaultArea.Contains(new Vector2(touchPos.x, Screen.height - touchPos.y)) && !moveTouch.isActive)
        {
            moveTouch.isActive = true;
            moveTouch.touchOffset = new Vector2(touchPos.x - moveTouch.defaultArea.x, Screen.height - touchPos.y - moveTouch.defaultArea.y);
            moveTouch.currentTouchPos = new Vector2(touchPos.x, Screen.height - touchPos.y);
            moveTouch.touchID = touchID;
        }
    }

    //Here we release the previously active joystick if we release the mouse button/finger from the screen
    void MobileButtonStop(int touchID)
    {
        if (moveTouch.isActive && moveTouch.touchID == touchID)
        {
            moveTouch.isActive = false;
            moveTouch.touchOffset = Vector2.zero;
            moveTouch.touchID = -1;
        }
    }
}
TouchPlayerController.cs
using UnityEngine;

public class TouchPlayerController : MonoBehaviour
{

    // Update is called once per frame
    void Update()
    {
        //Move Front/Back
        if (MobileJoystick_UI.instance.moveDirection.y != 0)
        {
            transform.Translate(transform.forward * Time.deltaTime * 2.45f * MobileJoystick_UI.instance.moveDirection.y, Space.World);
        }

        //Rotate Left/Right
        if (MobileJoystick_UI.instance.moveDirection.x != 0)
        {
            transform.Rotate(new Vector3(0, 14, 0) * Time.deltaTime * 4.5f * MobileJoystick_UI.instance.moveDirection.x, Space.Self);
        }
    }
}
Stap 2: Zet een eenvoudige scène op met behulp van de bovenstaande scripts
- Maak een nieuwe scène
- Maak een nieuw GameObject en roep het aan '_TouchInput'
- Voeg het MobileJoystick_UI-script eraan toe
- Wijs variabelen 'Navigation Circle' en 'Navigation button' toe.
Je kunt de onderstaande sprites gebruiken of klik hier:


- Nadat u ze naar Unity heeft geïmporteerd, moet u het Texture-type wijzigen in 'Sprite (2D and UI)'

Stap 3: Stel de spelerinstantie in
Ten slotte hebben we de spelerinstantie ingesteld (in mijn geval zal het een eenvoudig GameObject zijn met een cilinder erin):
- Maak een nieuw GameObject en roep het aan 'MobilePlayer'
- Voeg het TouchPlayerController-script eraan toe
- Maak een nieuwe cilinder en schaal de hoogte ervan af totdat deze bijna vlak lijkt (in mijn geval is de schaal (x: 1 y: 0,0142 z: 1))
- Verplaats de cilinder binnen het 'MobilePlayer' GameObject
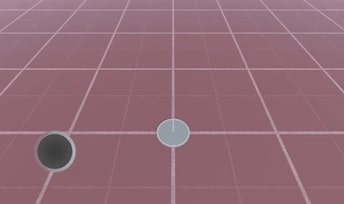
- Voor testdoeleinden kun je de hoofdcamera ook in de 'MobilePlayer' verplaatsen en draaien zodat deze als volgt op de speler is gericht:

Nu is het tijd om op Afspelen te drukken en te kijken of alles goed werkt.

Alles werkt zoals verwacht! De speler wordt bestuurd door de joystickknop rond te bewegen.
Het MobileJoystick_UI-script ondersteunt zowel mobiele aanraakinvoer als een muisklik (als je in de editor speelt).